Free Sewing Pattern and Instructions for making a PUL Fabric Drawstring waterproof Wet Bag
My kids start camp this week and will be swimming every day. To avoid a mess the wet swim suits and towels will create, I decided to sew up some quick drawstring wet bags. These bags can have many uses - great for trash in the car, soiled clothes from preschool or daycare, wet diapers, etc. This bag is finished with a drawstring closure at the top, but you could just as easily use a strip of sewn on Velcro.
This makes a generous sized bag and you can of course scale the size down to whatever works for you.
Materials:
Outside Fabric (red hippo fabric is from IKEA by the yard)
PUL Fabric for lining (waterproof fabric - more about PUL at Celtic Cloths and here as well)
drawstring (ribbon, cord, shoelace, etc.)
coordinating thread
Instructions:
1. cut both pieces of fabric to size: 24" x 18"

2. lay fabrics wrong sides together - shiny side of the PUL facing up and focus fabric facing down. Pin pieces together and sew an 1/8th of an inch around to secure the two pieces together. This step is important because the PUL fabric is very slippery and otherwise the fabric slips.
3. To start, fold down the top corners at a 45 degree angle and pin in place. This will create a hem for the drawstring. Lie the project flat and turn in each corner - sew in place.


4. Turn the top edge of the project down 1/4" and then fold again a full inch. Stitch in place creating a tunnel for the drawstring closure.


5. Here is the top hem completed:

6. Fold the project in half right sides together and pin in place. Sew along the side edge. If your sewing machine has difficulty with the PUL fabric (feed dog getting stuck), you can cut two small strips of tissue paper and lay them on either side of the fabric. Then just sew right on top of the tissue. When you are done with the seam, just tear the tissue paper off.

7. Sew along the bottom edge starting from the folded edge. Now the bottom and sides are sewn and the top edge is complete.
8. Now it's time to create the gusset at the bottom edge. Finger press the side seam open. Line up your seams on the outside by taking a pin and poking it through the side seam about 1 1/2" from the bottom.

Reach up inside the project to guide the pin from the inside of the side seam, out through the bottom....
 9. Turn the project over and poke the needle through the bottom so it comes out right in the center of the bottom seam. Flatten out the sides and secure the pin in place.

Repeat with the other side: only this time you won't have a side seam to measure from. So you'll need to use your finger to flatten out the side to create a crease and then use that as the side seam, measuring and pinning into the side seam and through the center of the bottom seam.

10. Flatten the bottom out.

Now place the project on your cutting mat and measure 2 1/2" from the tip. Mark with pen/pencil. Now sew across this line back stitching at the beginning and end.


11. Cut off the corner 1/4" from the sewn line. Repeat with the other side

12. Here is what it should look like with both side gussets built:

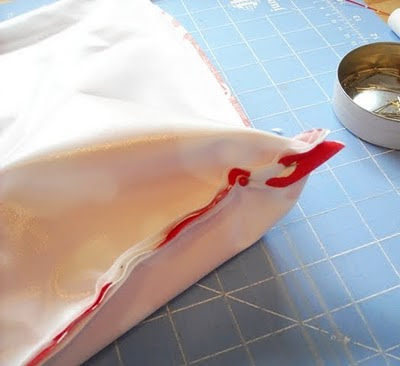
13. Clip all stray threads, and turn project right side out. Here is how your gusseted bottom should look:


Secure a safety pin to the cord to help you guide it through (easier to grab hold of and you won't loose the end inside).
 Tie the ends in a knot if you want.
Here is how it should look when complete:


Finished Size: 14" long by 11" wide:

Now lets get ready to swim!
Questions about these instructions? Please email me at woodponddesigns@gmail.com
Enjoy! Happy sewing
Jennifer -